Proxy iOS 11 applications’ traffic


A big part of understanding how mobile apps work is to identify the endpoints they hit on the server side and the data they send and receive. In order to inspect the mobile app's traffic we'll need to set up a proxy between the app and its server. Most applications use TLS when communicating over the Internet. We'll have to setup a proxy as a Man-in-the-Middle (MitM) with its own TLS certificate to decrypt the traffic sent from the application, re-encrypt it and re-send it to the server.
Two of the most commonly used proxies are Burp and Charles. Burp provides a free version called Community Edition with some limited functionality, and a Professional version with a price of $349.00 per user, per year. Charles provides a free trial version also with limited functionality and a variety of licenses, for more information check their website.
Proxy traffic with Burp
- Download and install the latest version of Burp here.
- Open the Burp application.
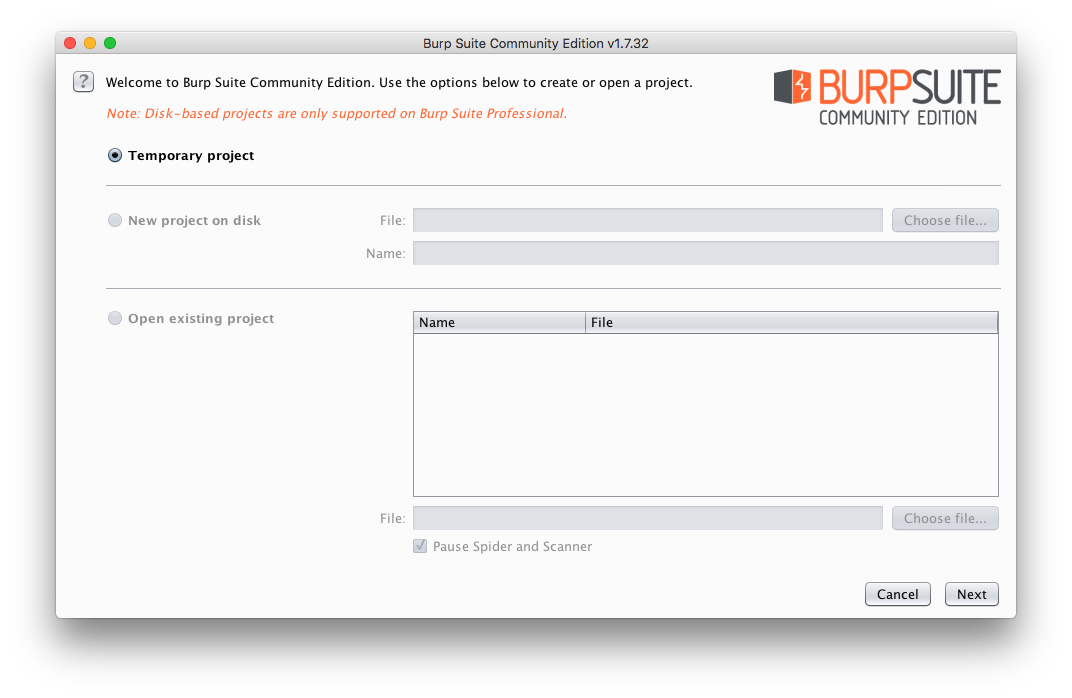
- The first screen you see asks you to select a project or start a new one. You can save previous projects in a Burp Project and load them later to continue working. For a quick test you can select Temporary project and then click next.
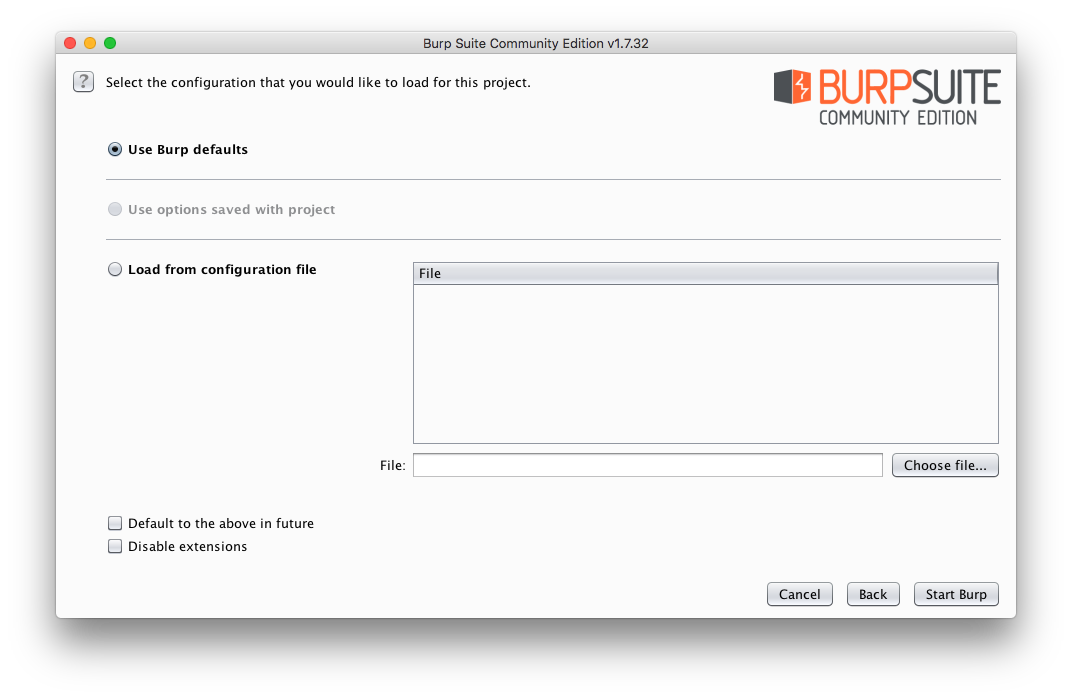
- The next screen will ask you to select a previously saved configuration or user Burp's default one. You can also save configurations to avoid having to setup Burp every time. For a quick test you can select Burp defaults and then click Start Burp.
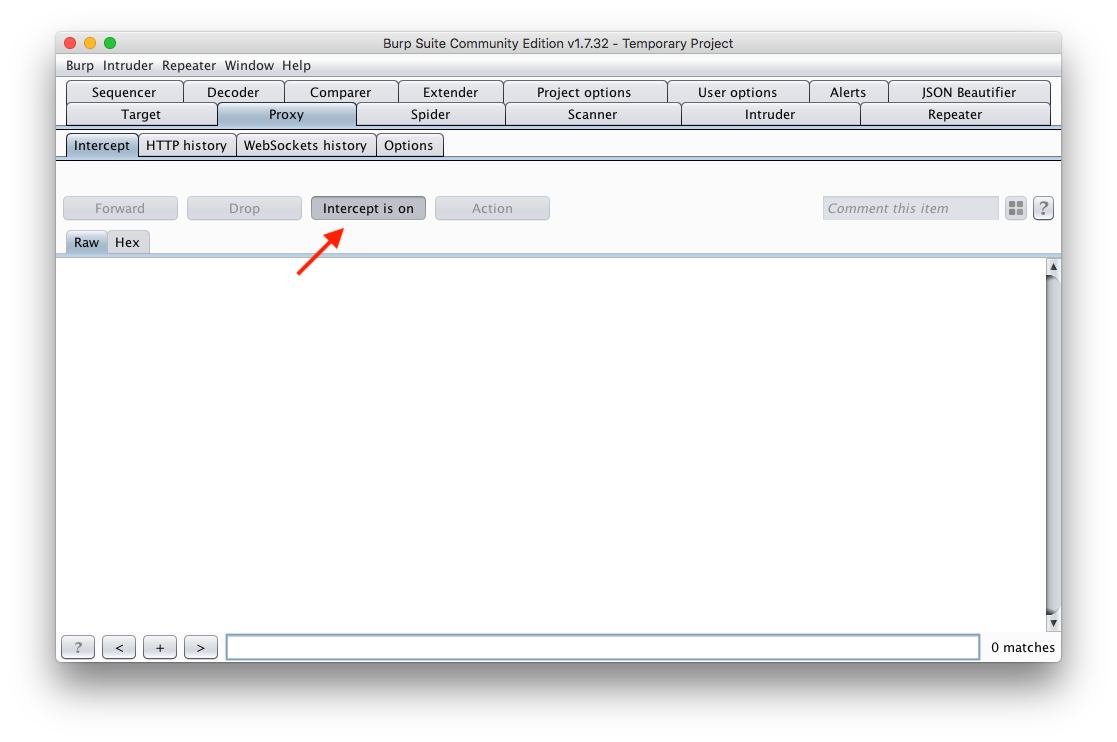
- Select the Proxy tab and it will auto-select the Intercept sub-tab. Very important! notice that the button Intercept is on is selected by default, this means that any network request being proxied through Burp will be stopped until you click the Forward or Drop buttons. To let traffic flow just click the Intercept is on button.
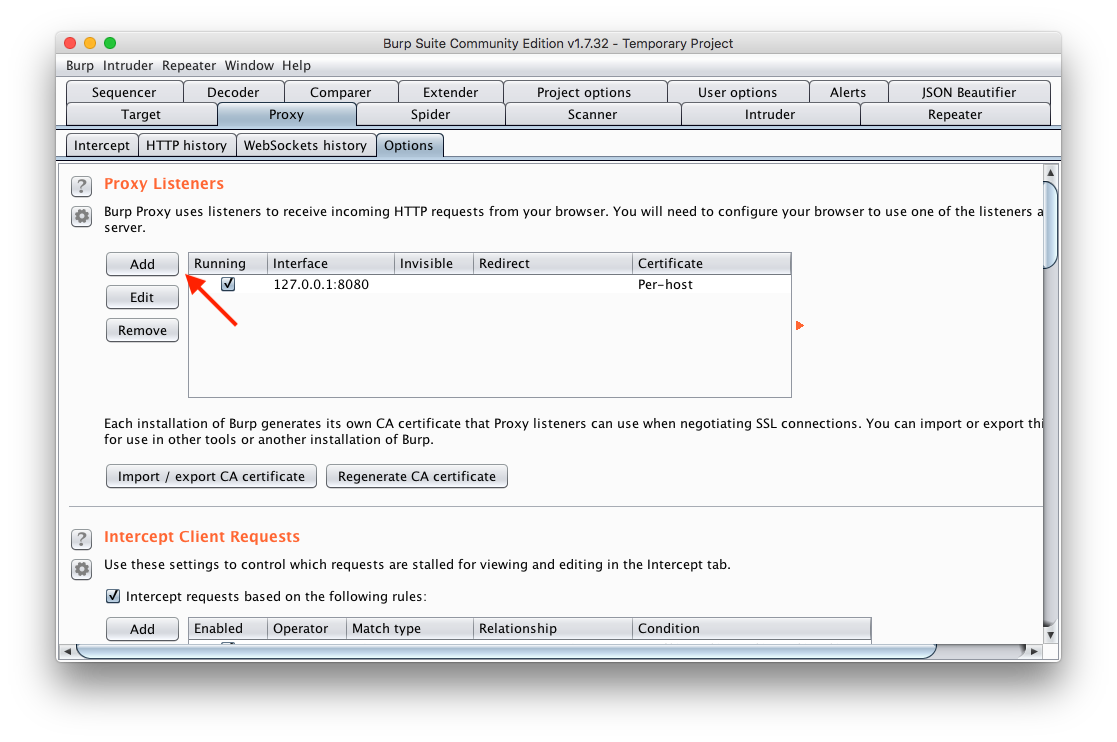
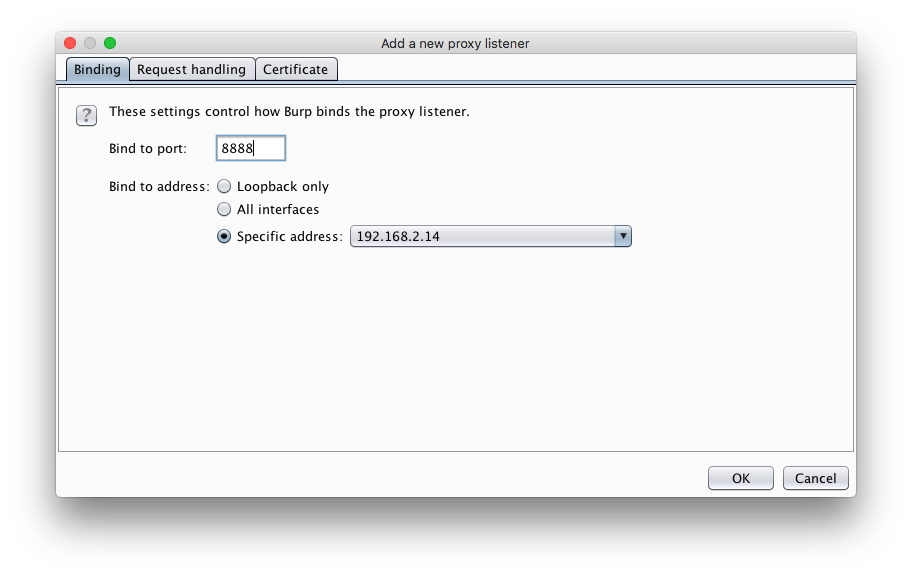
- Click on the Options sub-tab and on the Proxy Listeners section click the Add button.
- Fill the Bind to port field with a port, for example
8888and select your machine's local IP address, for example192.168.2.14and click OK.
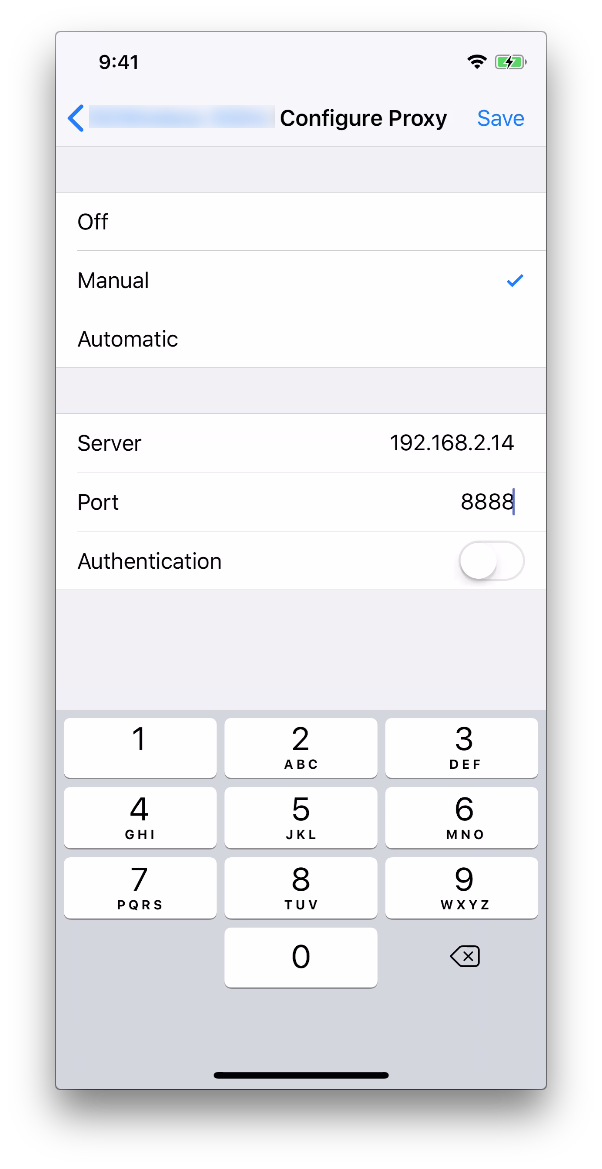
- On your iPhone/iPod/iPad (iDevice) open the Settings app, select Wi-Fi, tap on your wifi's SSID (name), scroll at the bottom to the HTTP PROXY section and tap on it. Tap on Manual and 3 new options will appear, in the Server field type the IP address you selected in Burp and in the Port field type the port you entered in Burp. Finally tap on Save in the upper right corner.
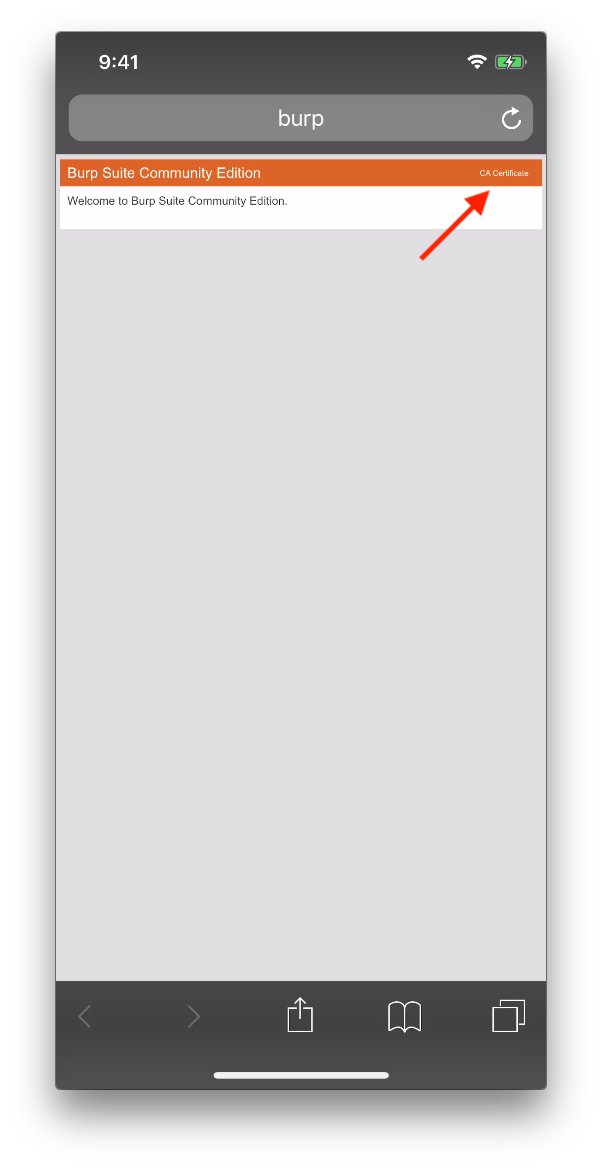
- On your iDevice open Safari and in the URL Bar type
http://burpand when the website loads, tap on the CA Certificate link in the upper right corner. Follow the instructions to install the certificate: Enter your PIN and tap on Install Certificate.
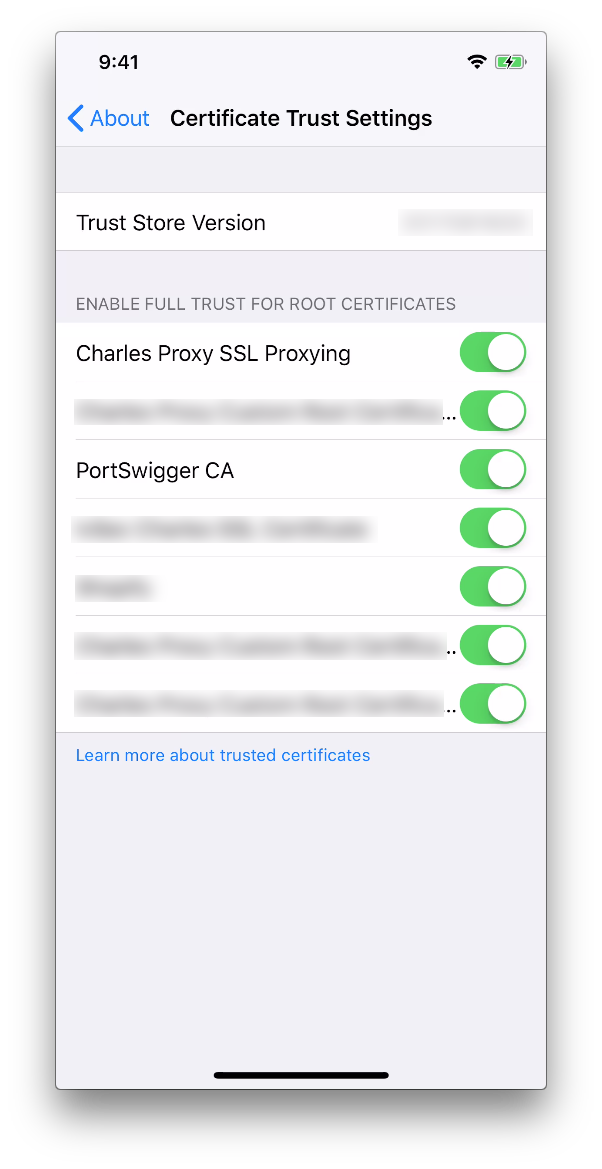
- Lastly, open the Settings app again and tap on the About item and scroll down to Certificate Trust Settings and Enable the newly installed certificate, usually named
PortSwigger CA.
Proxy Traffic with Charles
- Download and install the latest version of Charles from here.
- Open the Charles application.
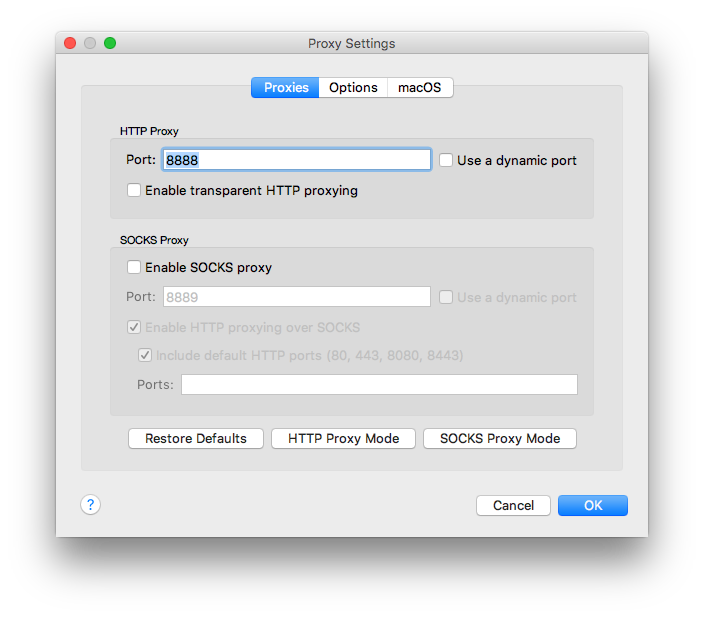
- Setup your iDevice's HTTP proxy exactly the same way as I explained for Burp in the previous section. In the Server field type your machine's local IP address and in the Port field type the Charles' port, by default it is
8888. To check what's Charles' port click on Proxy from the upper menu and then Proxy Settings.
- Sames as with Burp, on your iDevice open the Safari app and in the URL Bar type
http://www.charlesproxy.com/getssl(or googlecharles getssl). It will automatically download a TLS Certificate, follow the instructions to install the certificate: Enter your PIN and tap on Install Certificate. - Open the Settings app again and tap on the About item and scroll down to Certificate Trust Settings and Enable the newly installed certificate, usually named
Charles Proxy SSL Proxying.
Now you should be able to open any app or website on your iDevice and see the plaintext traffic in Burp or Charles. This will help you understand the data the application sends and receives as well as the endpoints on the server side. But even better, now you can repeat network requests, change parameters and observe how the server reacts, also edit data as comes back from the server and observe the app's behaviour with the modified response.
Important: some applications use HTTP Public Key Pinning (HPKP) which means the application only accepts the pinned public key information and any other public key/certificate will be rejected; other applications implement a simpler pinning, a certificate pinning, which pinns against a specific certificate, this implementation also breaks the MitM approach. The techniques to bypass these implementations will be discussed in a future post.
Photo by Jake Givens on Unsplash